How to Set up the Revelana Calendar for your Medical Spa
STEP-BY-Step tutorial
Watch this video for a full walkthrough of how to set up your calendars, or follow the steps below!
Step 1
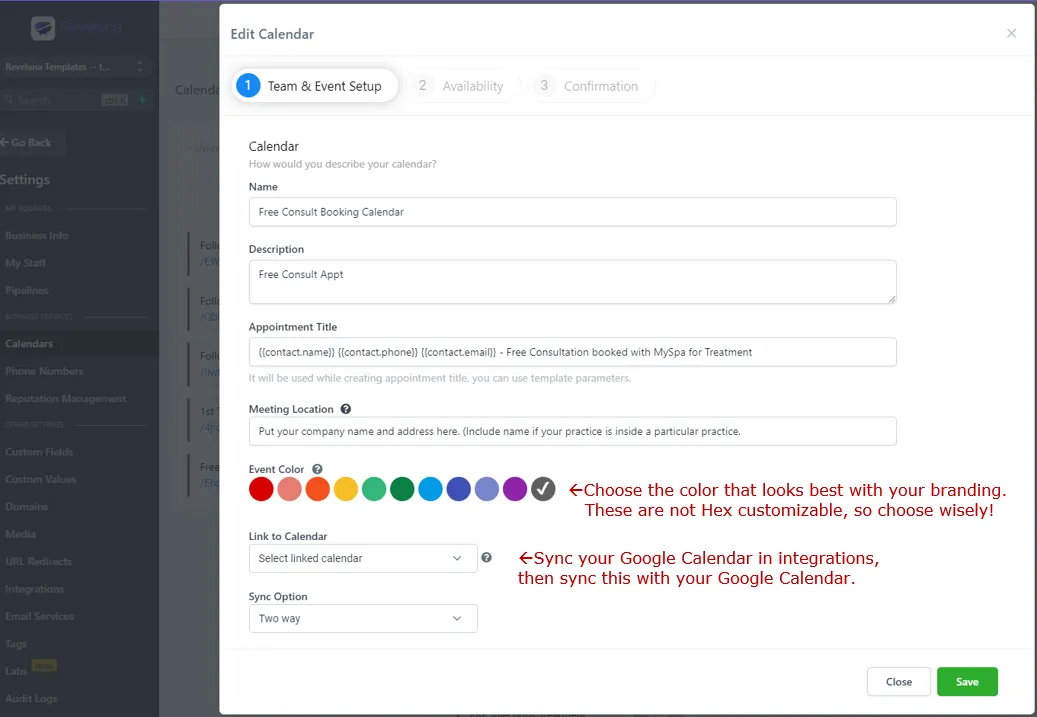
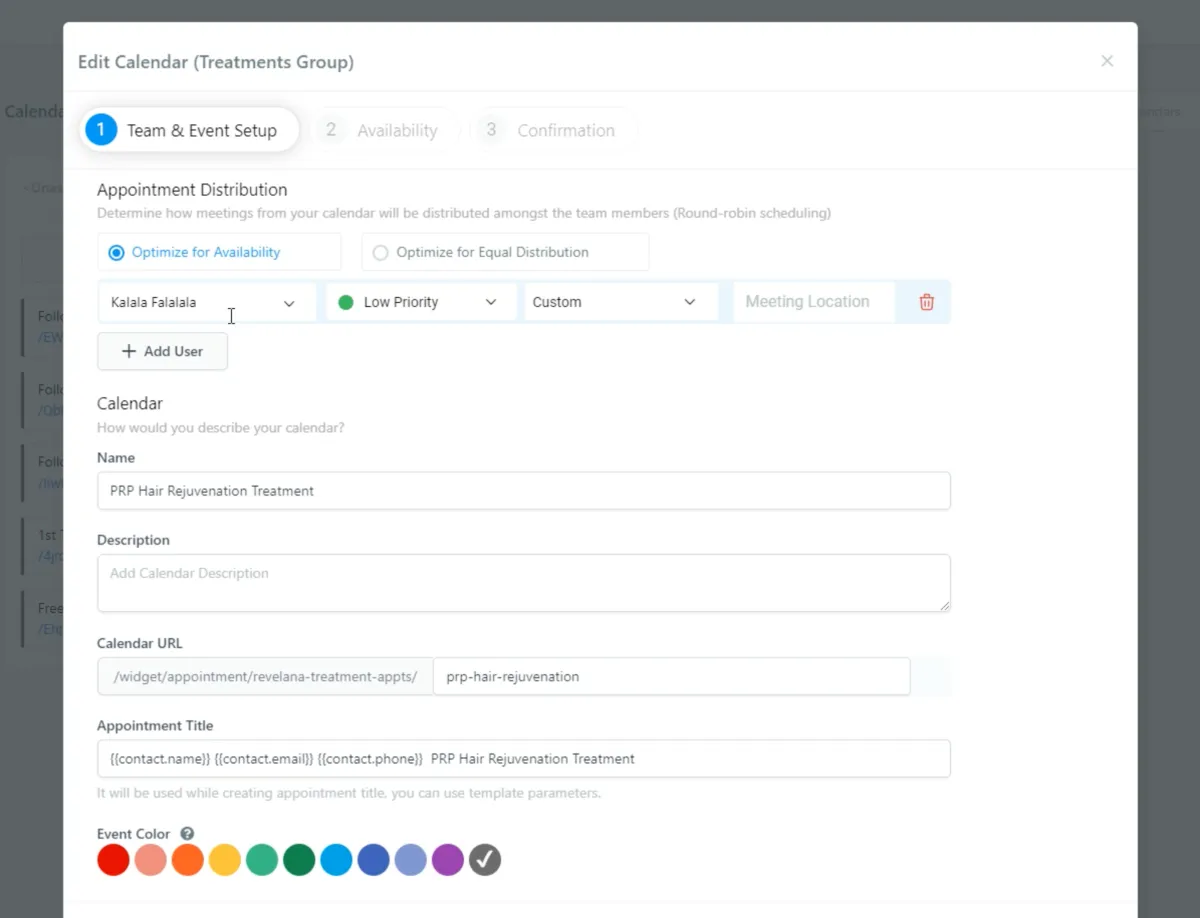
Add your description
This only shows up for the contact, not the user calendar
Add your appointment title
This is what will appear on your & the customer's calendar
Link to Calendar
Watch this video on how to integrate your Google calendar with Revelana. You'll want to link it here.
Step 2
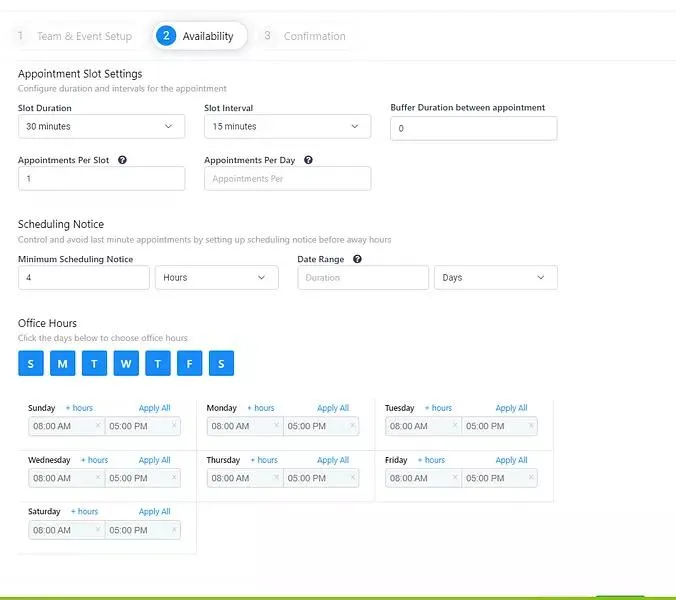
Edit your schedule & availability
Edit your slot duration (how long this service lasts), slot interval (times that users can pick appointment time), buffer duration (time between appointments).
Set the scheduling notice duration
Play it safe by setting a minimum time for someone to book an appointment before the actual appointment.
Set your office hours
Step 3
Set your form settings
"Sticky Contact" means it'll automatically input the client's info if they've filled out other forms of yours. We love sticky contact!
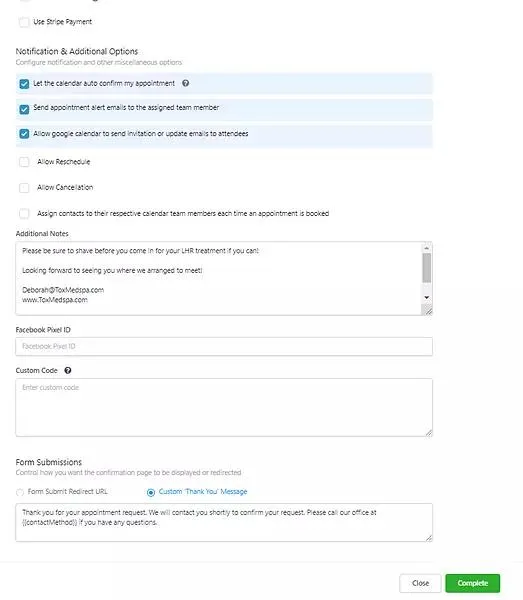
Set your notification options
We recommend letting the calendar auto confirm, allowing the google calendar to send invite, unchecking "allow reschedule" and "allow cancellation".

Step 4
Add additional notes
Add anything you want to include for you and the client to see when they've made the appointment!
Edit form submissions
You'll see a custom thank you message for at the bottom, but our template is set to bypass that and send them a far more personalized workflow once they press submit!
Step 5
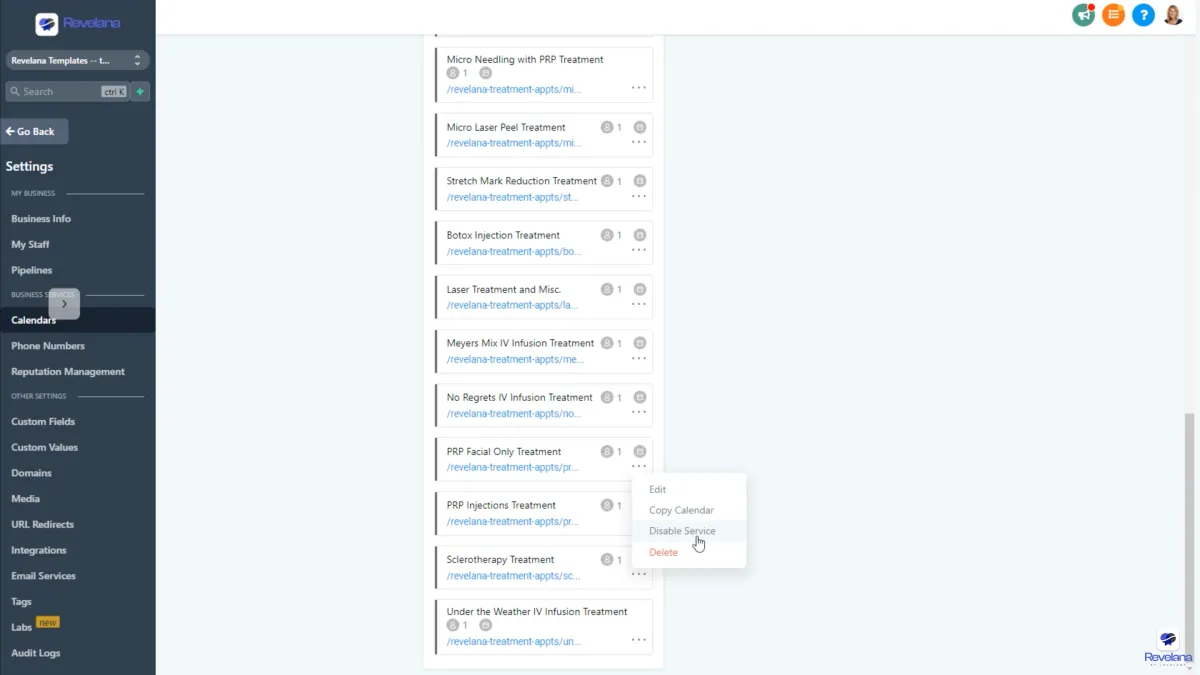
Enable/disable treatments
Go through the treatments list and disable any treatments that you don't provide. Go in and edit each service you'll have on your calendar!
Step 6
Add user to calendar
Important! You will have to assign a user to the treatment calendar in order for it to work. We have a video on how to add users to your team here!
Step 7
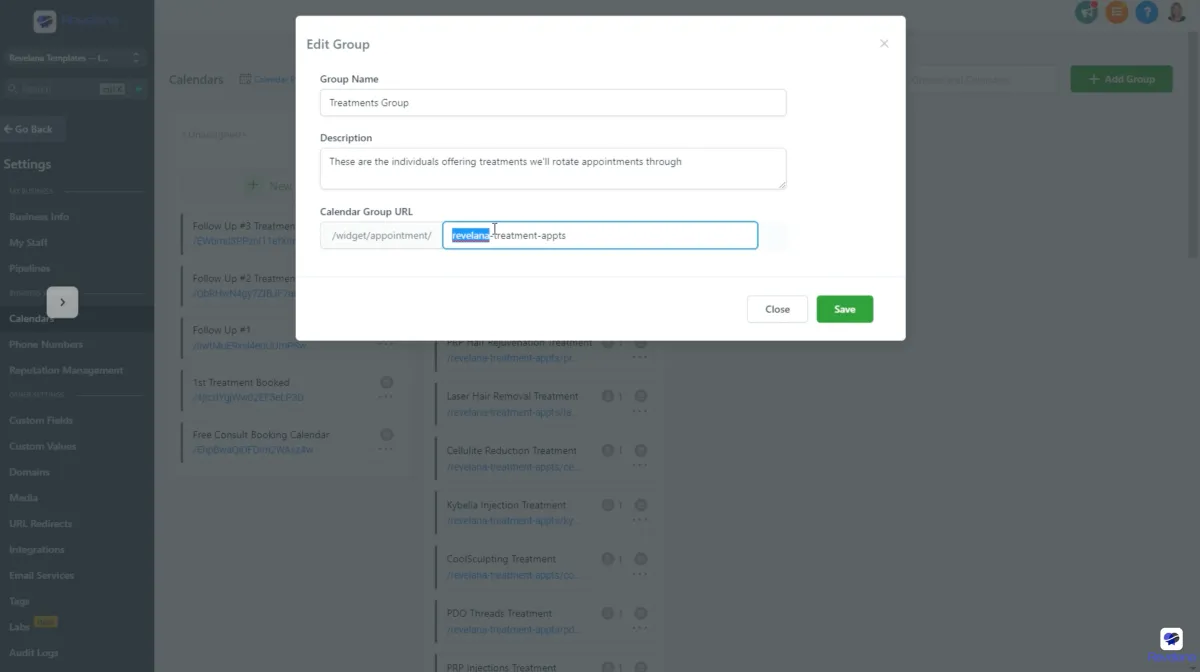
Update the Calendar Group URL
Hit the three dot icon next to "Treatment Group" and hit "Edit Group", and change the URL to remove the Revelana in the link!
Any more questions?
Go back to the full tutorial page, or please message us and ask!
Copyright Revelana by Louology 2023 - All Rights Reserved

